Showing posts with label desi. Show all posts

Sunday, April 18, 2010

Hyderabadi Chicken Biryani

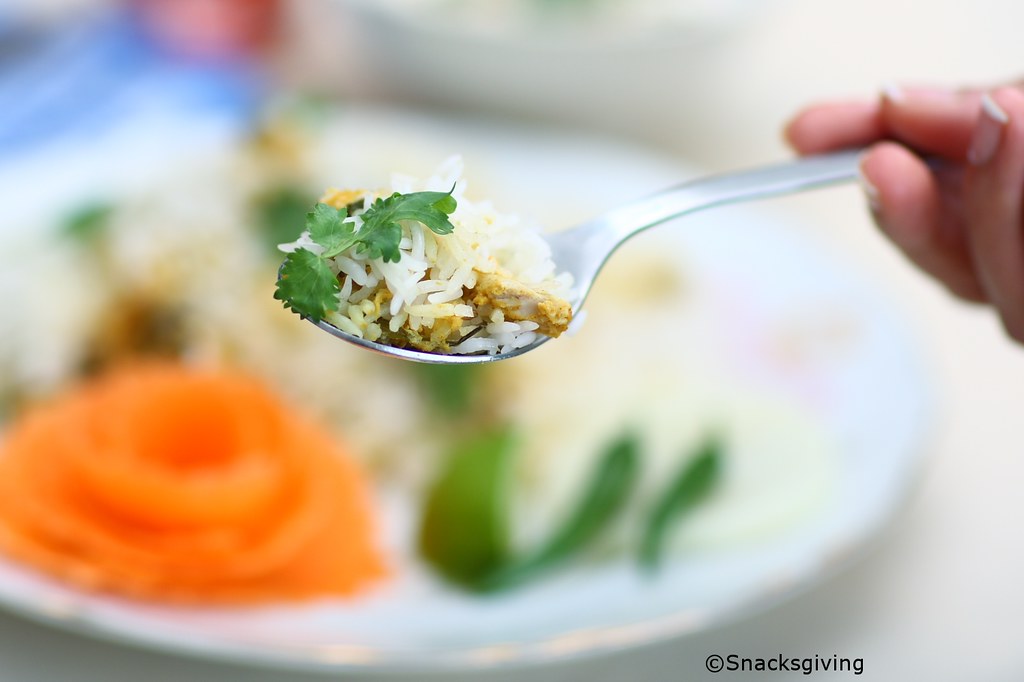
Hyderabadi Chicken biryani

It's the weekend. Time to chill, relax and eat good food. Even better if I don't have to do the cooking :). No, I am not usually "order from the takeaway" type, and the Lord knows that if you want to have a good "curry" - Curry here being the British invention of the word that is meant to be a synonym for "Indian Food", then Zurich is not the best place for it restaurant-wise. There, I said it! I mean, ok, there are nice Indian restaurants, but, modesty be damned, the food we cook at home is usually a lot better and a lot less greasier, a lot spicier (read tastier ;-p) than the cream laden dishes a lot of Indian places serve.
Anyways, I digressed. Where was I? Weekend - yes. So weekends is when we most certainly make one dish almost unfailingly - Hyderabadi Chicken Biryani. And why is that? It is very simple and easy, quick, and is very very tasty! But most importantly,Darling husband loves to cook this dish! And I couldn't be happier about it :-D

NOTE
  • It uses a lot of whole spices. I strongly recommend buying the whole spices, rather than store bought powders. It wouldn't be expensive, and once you have made a proper biryani, you'll repeat the recipe so many times (yes, I am sure of that!), that they'll be used up in no time.
  • It is an easy recipe. But ONLY if you know the pitfalls and how to avoid them. These are mentioned at the end of the post

  • Hyderabadi Chicken biryani

    INGREDIENTS
    • 2 pieces each of cardamom, mace, cloves, cinnamon sticks, green cardamoms
    • 6 pepper corns
    • salt - to taste
    • 4 bay leaves
    • 1/2 teaspoon cumin powder
    • 1 teaspoon coriander powder
    • 1 tablespoons crushed garlic
    • 2 cups basmati rice
    • Handful of fried onions (optional)
    • A handful of chopped coriander(cilantro) leaves
    • 1 stalk of chopped fresh mint leaves
    • 500 grams chicken pieces cut into small pieces
    • 5 green chilli (deseeded if you prefer)
    • 2 + 1 tablespoon oil or ghee(clarified butter)
    • 1 tablespoon finely chopped/grated fresh ginger
    • 1/2 tsp saffron strands soaked in 1 tablespoon warm water(optional)
    • 1 teaspoon turmeric
    • 2 cup full fat yoghurt

    DIRECTIONS

    1) Soak rice for 30 minutes in enough water to cover
    2) In the mean time, marinate the chicken. Take the chicken pieces in a large bowl and add in the 2 tablespoons oil, yoghurt and all the spices mentioned above, except saffron.
    3) After 30 minutes, drain the rice
    4) Take a pot of water and add the drained rice to it.
    5) Add the salt to the rice, and taste it. Adjust the salt to your taste
    6) Add in the remaining oil, a teaspoon of cumin seeds and let it cook for about 5 minutes or so.
    7) Very important - When the rice is beginning to come to a boil, not a full rolling boil, but just beginning to, take it off the heat and drain. The rice grains should be half cooked.
    8)In a deep, heavy bottomed dish, layer all of the marinated chicken. Press it down gently
    9) Add the half cooked, drained rice on top of the chicken
    10) Add the saffron and saffron soaked water, if using. Also add some chopped cilantro, and sliced onions
    11) Cover with a lid and cook. Make sure the lid is a tight one. Cook on medium-high for 5 minutes, medium for 15 minutes, and then 15 minutes on low heat.
    You should start getting the sweet aroma of the spices in your kitchen.
    Serve with plain youghurt or raita.

    PITFALLS & TIPS

  • Overcooked rice.
    • Use good quality basmati rice for biryani
    • Do not soak it for longer than 30 minutes.
    • Only half cook the rice before layering on to the chicken. To check, take a few grains of rice and apply a little pressure with your fingertips. If it breaks apart - it is half cooked. If it gets squished, it is overcooked for the biryani :(
  • Burnt chicken
    • Since chicken forms the bottom layer for the cooking, if left to cook on a high heat, it will get easily burnt.
    • Use a heavy bottomed pan
  • Watery Chicken Biryani
    • Drain the rice before layering on the chicken. The steam within the pot will cook the dish.
    • Do not use a pressure cooker for this preparation

    There it is. A primer for the perfect Hyderabadi Chicken Biryani. A dish that we love. When people go to Hyderabad, India, this is one of the things on every tourist's menu. Traditionally it is server with raita and another very spicy dish called "Mirchi ka Salan". Oh my mouth is watering! There are very few dishes on the planet that I can never say no to. This holds a very high position. Try it. I cannot recommend it enough.

    P.S. - Writing this post is almost like making a PowerPoint presentation. That was the last time I used so many bullet points!
    Share

    Wednesday, April 14, 2010

    Bhindi Do Pyaza


    I am an Indian. Did you know that? No, you did not? Why? 'Coz you freakin hardly ever post any Indian recipes!!! Thats why!

    Ok. Got it. Point noted.
    (Well, that I hardly ever post *any* recipes would not be far from wrong lately, but we'll leave that for another day)

    In my conscious effort to prove my 'desi'ness, and my love of Indian food, there will be some posts on Indian food in the coming days.
    Bhindi - Okra or lady's fingers(!!) as it is also known, is a vegetable that I have seen many people shy away from. Too slimy, gooey and slightly messy is their reason. And of course some, who do not know what to use it for. I was surprised when at the grocery store where I was painstakingly choosing each okra for purchase, a Swiss women asked me whether it was a type of chili. Well, we Indians do eat spicy food, but I was loading up like a kilo of okra - surely I'd be just plain mad to be using all that amount of "chili" in a recipe!..Bad joke..

    Okra is often used as a thickener in soups and stews in different cuisines. In India, it is often one of the vegetables added to Sambhar - a soup made with dal, tamarind and a few vegetables. In the north, it is generally fried with onions, and sometimes tomatoes.

    Bhindi do pyaza is the dish on the menu today.
    Bhindi = okra
    do = 2 or twice
    pyaza = onions
    Twice the amount of onions that added in any other similar vegetable preparation.

    So the vegetables used are just 2 - okra and onions. And the rest are all spices. This is the dish I have eaten okra in all my life. And I love it! It gets a bit slimy while cooking - but I am quite ok with it. Adding a bit of sourness - like lemon juice or vinegar does help cut the sliminess. So here is the recipe.


    INGREDIENTS:
    25-30 Okras, washed, dried and cut into 1/4" pieces, or slit lengthwise
    2 medium Onions, thinly sliced
    3+1 tbsp Oil
    1/2 teaspoon cumin seed
    1 tsp Turmeric Powder
    1 tbsp Lime/Lemon Juice(optional)
    1 tsp Jeera/Cumin seeds
    Salt to taste
    1 tablespoon coriander powder
    1 teaspoon red chilly powder, adjust to taste
    1/2 teaspoon mango powder (amchoor)
    1 and half teaspoon garam masala

    RECIPE

    - Wash and thoroughly dry the okra
    - Cut the tip and a 1/4" from the bottom and discard
    - Cut the okra into 1/4" pieces, or slit lengthwise
    - Heat 3 tablespoons of oil in a pan
    - Add in the okra and stir fry on high heat for 6-7 minutes
    - Transfer to a dry plate
    - Heat 1 tablespoon of oil in the same pan
    - Add in the cumin seeds and allow them to sizzle
    - Add the onions and salt and fry them until the become translucent
    - Add in the remaining spices and let them cook for a few minutes. Ideally you should see a bit of oil seperating when the spices have cooked
    - Mix in the okra and let it all cook for another 2-3 minutes. If it gets too slimy, then add in the lemon juice as well.

    Bhindi do pyaza
    TIPS

    - Do not be stingy in the amount of oil added
    - Keep the heat high while stir frying the okra
    - If making okra the first time, you can just try slitting the okra lenghtwise. Chopping into small pieces, while ensures faster cooking, can get a tad messy due to the goo.
    - Make sure the okra is completely dry before you get chopping it.
    - Only choose the okra that is very fresh, not even slightly wilted. Remember the "painstakingly choosing every okra" reference in the beginning of this post? :) Share

    Sunday, December 13, 2009

    Coconut burfi

    I continue from my last post on my love and craving for 'desi' sweets and desserts around this time of the year. The celebratory atmosphere is just infectious, isn't it? A time to let go and forget about the calories for a change - after all the time to make new resolutions is not far!

    Coconut burfi is what's on the menu today. Another one of my childhood favourites. Although we rarely made it at home, it was regularly seen around the house when we would have guests over. And I would wait for the guests to leave so I could eat them all up! Haha! Fun times!
    Anyways, for those not familiar with a burfi - it is a fudge like Indian sweet and is prepared with a lot of different ingredients and flavours - the popular ones being cashew, almond, coconut, or just with thickened milk.

    So here is the recipe.
    4 cups finely grated coconut
    1 14 oz can of sweetened condensed milk
    4-5 cardamom pods - seeded and crushed
    Pistachios for garnish

    Traditionally, a fresh coconut is used, and of course it gives the best results. But since it is not so readily available here, the dry one from the grocery store works fine and is quick and convenient.
    Dry roast the coconut on medium-low heat for a couple of minutes until it releases the typical coconut-y aroma (around 8-10 minutes). Sprinkle the crushed cardamom seeds and stir. Add in the condensed milk and stir. Continue stirring until it all starts to clump up - this should take only about 3 - 4 minutes. At this time, pour it onto a greased plate. Flatten it out evenly and let it rest for about 10 minutes. Allow it to set in the refrigerator for about 45 minutes to an hour. Take it out, cut it into squares and garnish with pistachios. Share

    Sunday, December 6, 2009

    Malpua - Sweet Indian pancakes in syrup

    Amidst all the Christmas festivities and the numerous cakes and desserts to be seen at this time of the year, there are days when I crave something totally ..well, "Desi"! By 'desi', I mean Indian. There are so many amazing desserts and sweets that we make during our festival season, that I am finding myself craving for so many of those these days!
    Malpua - a sweet pancake dipped in syrup, and served with milk pudding(kheer), is one of my favourite dishes that my mom makes on some special occasions. The way we make it at home is way too cumbersome for me, and yes, I have tried it a few times, and failed on every occasion :-)
    So I took the shorter route, and I can proudly say that it has been successful in each attempt. This one uses condensed milk. Here is the recipe

    For the pancake
    1/2 can sweetened condensed milk (200 g/7 oz)
    1/2 cup all purpose flour
    1 cup semolina. (You can substitute it with all purpose flour if you can't find semolina)
    1 teaspoon fennel seeds
    1/2 teaspoon baking powder
    1 cup water
    a pinch of salt
    oil for deep frying
    pistachios/nuts for garnish

    For the syrup
    1 cup sugar
    1 1/2 cup water.

    Prepare the syrup by bringing sugar and water to a boil. Keep it aside. I don't make my syrup too thick. Most people recommend a single thread consistency for this syrup. But I like it to be thin, and don't soak my pancakes in it for longer than a minute either. The condensed milk adds sufficient sweetness for my taste.
    For the pancake - mix in all the dry ingredients. Then add the condensed milk, and water to form the batter. Deep fry these pancakes in hot oil for a about a minute each side - until they turn golden brown.
    Dip these in syrup for about a minute. Serve them on a plate and garnish with pistachios.
    These are served with milk pudding, but I didn't make any. So I served it with ice-cream. Vanilla ice-cream would be just perfect with these babies. Share

    Monday, July 13, 2009

    Chicken tikka


    Chicken tikka, Paneer makhani, Vegetable samosa, gulab jamun..
    Some dishes command that they only be used in a sentence with a few superlatives. When reading the menu at a nice Indian restaurant, I usually find myself saying 'wow, awesome, sounds great, this'd be delicious..' - all of it making my mouth water!
    Anyways, so today we had chicken tikka for lunch today, and boy, did it taste awesome or what! And as is the case with most dishes that we make frequently (yes 'we' because chicken and fish are usually my hubby darling's specialities), it is quite a simple dish to put together - it does need a lot of ingredients, but if you have them all handy, it is hardly any effort to transform it into a delicious dish. So here is how to prepare it.
    - 1 onion
    - 2 bell peppers (of different colours)
    - 2 tomato
    - 500g chicken
    Cut all the above into bite size chunks.


    For the marinade, you need
    - 1 cup yoghurt
    - 1/2 teaspoon crushed ginger
    - 1/2 teaspoon crushed garlic
    - 1 teaspoon garam masala
    - 1/2 teaspoon cumin powder
    - 1/2 teaspoon coriander powder
    - 1/4 teaspoon turmeric
    - 1/2 teaspoon fenugreek leaves
    - 2 green chillis - finely chopped and de-seeded if you don't like it hot
    - juice of half lemon
    - 2 tablespoon oil
    And some coriander for garnish

    Mix all the ingredients for the marinade. You can marinate the chicken and vegetables for 30 minutes or more - marination does add to the flavour, but we usually skip it, and guess what - it still is very tasty!
    Thread the chicken and vegetables onto skewers, and place them on a hot grill. Keep some gaps between each chicken/vegetable piece to allow for even cooking. Cook for about 10-12 minutes, turn over the skewers, and cook for another 10 minutes. You could also cook this in an oven - preheat it to 350 degrees, skewer on the chicken(soak the skewers in water for about 30 minutes prior to using), and bake it for about 25 minutes. Use a lemon wedge and some coriander leaves for garnish and dig in! Share